
Reviewed · MOUNTAIN CLIMBING TOURS
From La Paz: Huayna Potosí Mountain 3-Day Ice-Climbing Trip
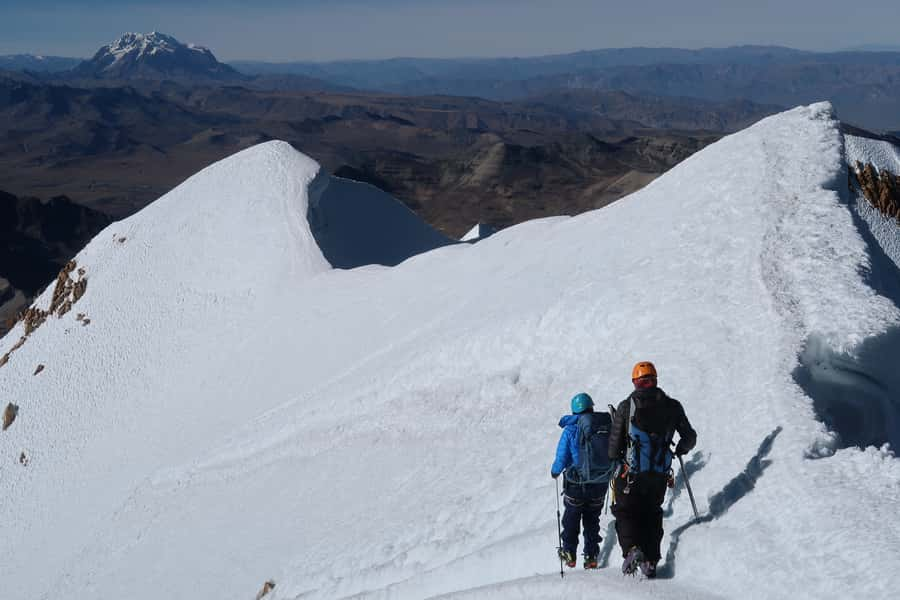
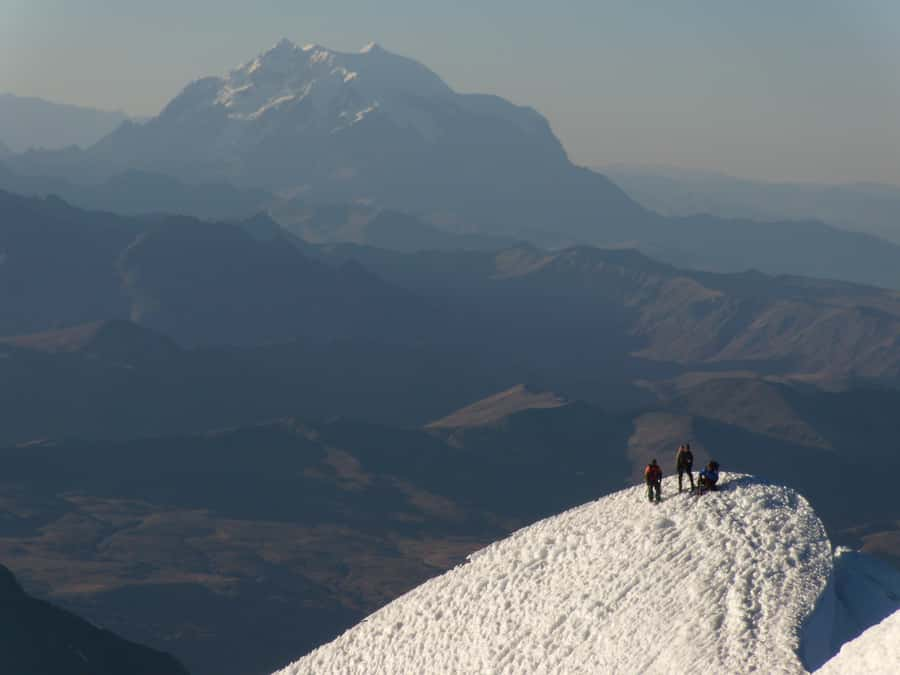
Huayna Potosí gives you a real shot at a 6,000-meter summit without committing to a long expedition. I like the hands-on glacier training on day one, and I like that the price includes technical gear, meals, refuge nights, transport, and a professional mountain guide. The reward is a sunrise summit ridge with views toward Illimani and Illampu.
This is not a scenic walk with a little snow added. You need solid fitness, prior acclimatization, and the grit to climb for 9 to 13 hours on summit day. Equipment quality may vary, so inspect every boot, crampon, strap, and jacket before leaving base camp.
Key points at a glance
- A genuine 6,000-meter climb: Huayna Potosí is a serious high-altitude goal, not simply a day hike from La Paz.
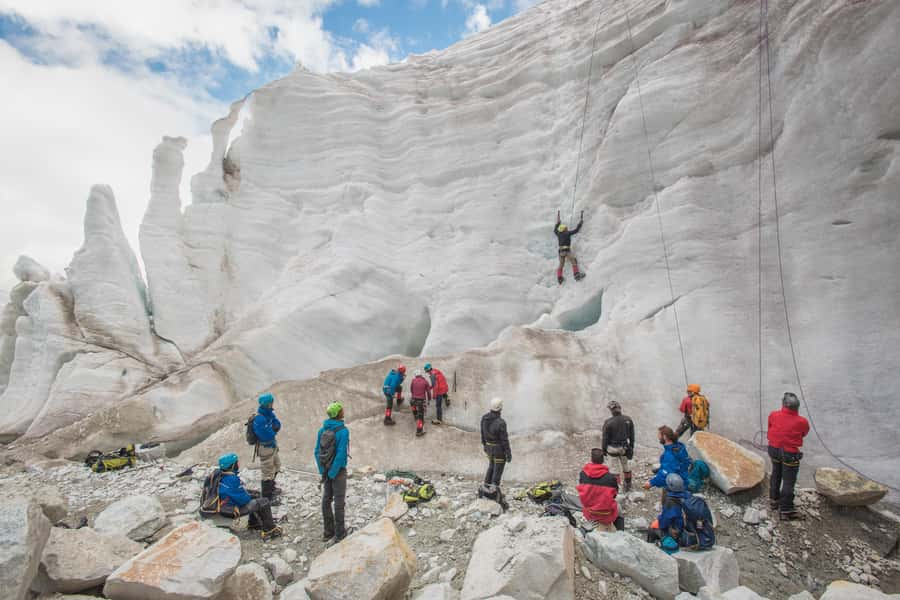
- Training comes first: You spend three to four hours practicing crampons, ropes, ice axes, and basic ice climbing on the lower glacier.
- The summit day starts around 1 AM: Expect darkness, cold, a roped glacier climb, steep sections, and a long descent.
- Technical equipment is included: Double boots, crampons, harness, ice axe, helmet, gaiters, warm outer layers, gloves, and other mountain gear are supplied.
- Guides make a major difference: Francesco, Andrés, Francisco, Silver, and Macario have led recent outings, with praise for patience, encouragement, cooking, and safety.
- Pack carefully: You need thermal underwear, socks, sunglasses, sunscreen, snacks, a sleeping bag, and a backpack. A porter and rental gear cost extra.
What you are really signing up for at 6,088 meters
Huayna Potosí rises in Bolivia’s Cordillera Real, northeast of La Paz. The mountain is famous because its normal route is considered a possible first 6,000-meter climb, but that label can mislead you. High altitude makes simple movements hard, and the summit day demands stamina, balance, cold-weather discipline, and steady concentration.
You do not need to arrive as a technical climber. The first day teaches the basics, including crampon use, ice-axe technique, rope travel, and movement on snow and ice. Still, training cannot replace acclimatization. You should spend time at altitude before the climb, and you should be honest with your guide if you feel unwell.
The advertised price is $344 per person. For three days, that is a fair package if the included transport, meals, refuge beds, technical equipment, and guiding all meet your needs. Hiring each of those services separately would take time and could cost more.
The price does not include insurance, a backpack, a sleeping bag, or a porter. You can rent the pack and sleeping bag, and you can hire a porter to carry up to 20 kilograms one way. Think carefully before carrying too much yourself. At altitude, an overloaded pack can turn a hard climb into a poor decision.
More high peaks to climb near La Paz:
- Climbing Huayna Potosí
★ 5.0 · 50 reviews - From La Paz: Huayna Potosí 2-Day Climbing Trip
★ 4.7 · 10 reviews - From La Paz: Austria Peak One-Day Climbing Trip
★ 4.8 · 8 reviews
Day one: from La Paz to the lower glacier
The trip begins with a roughly 1.5-hour drive from La Paz to Paso Zongo. Check the pickup details carefully before you go. The meeting point is the Climbing South America flag outside Pachamama Gallery at Linares 940, and the information provided also says hotel pickup is not included, despite describing a pickup from your hotel. Confirm this point rather than assuming a vehicle will come to your lodging.
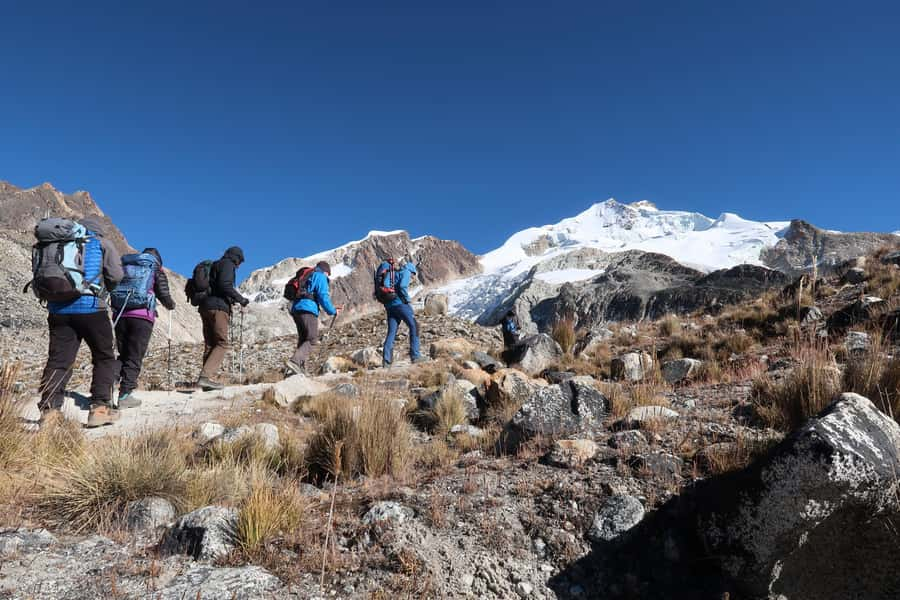
At Paso Zongo, you leave some gear in a hut and eat lunch. Then you hike for about an hour toward the lower glacier. This approach is useful preparation, but it is not the easiest walk. One account describes the rigid plastic snow boots as heavy and painful on rocky, sloping ground, especially when worn before reaching the ice.
That complaint matters. Boots made for crampons and snow protection can feel clumsy on bare rock. If your feet are hurting before the technical practice begins, tell the guide early and check for a better fit.
The glacier session lasts about three to four hours. Your guide explains how to use the ice axe, attach crampons, move while roped, and handle basic mountaineering equipment. You also practice on small ice walls with safety ropes. This is the most useful part of the first day because it turns unfamiliar gear into something you can manage before summit night.
Guides vary by departure. Francesco has been praised for clear English, care, and cooking. Andrés has also been singled out as an excellent guide and cook, while Francisco, Silver, and Andrés have led groups with an encouraging approach. Macario has been described as persistent and supportive when the climb became difficult. Your guide may be someone else, so treat those names as examples rather than a guarantee.
After training, you hike about an hour back to base camp. A cook prepares dinner, and you sleep in a refuge. Lunch and dinner are included on this day.
Day two: the slow move to high camp
After breakfast, you hike for three to four hours to high camp. The route follows a well-used rocky path to a rock buttress at the foot of the glacier. Compared with summit day, it is a fairly manageable ascent, but the altitude makes every uphill step count.
High camp is where the trip changes character. You are no longer just practicing near the glacier. You are sleeping close to the route so that the summit attempt can begin around 1 AM.
Once you arrive, you prepare the equipment for the morning. This is a good time to sort layers, check headlamps, organize snacks, and make sure your crampons and harness are ready. The refuge provides a place to rest, but do not expect a normal night of sleep. The early start, cold, altitude, and anticipation all work against deep rest.
Breakfast, lunch, and dinner are included on day two. Drink as much as you comfortably can and follow your guide’s instructions. You want to reach the glacier rested and hydrated, not weighed down by a large meal or a badly packed bag.
Summit day: a 1 AM start and a long return
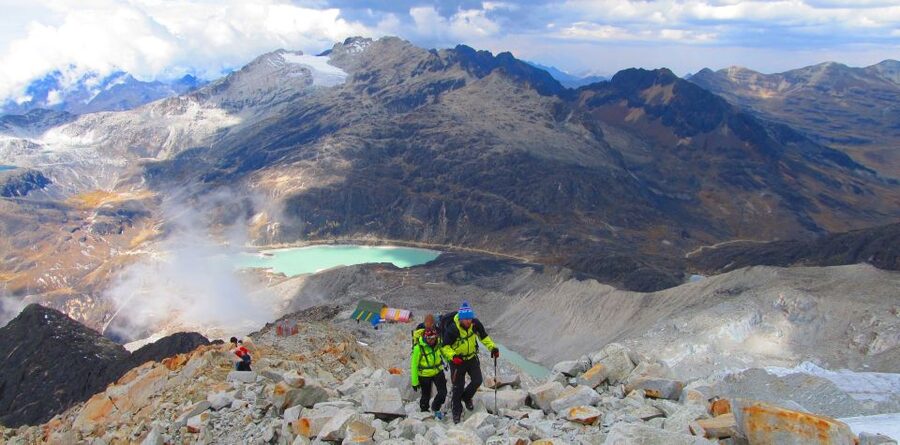
You start in darkness, so warm clothing and a working headlamp are essential. A headlamp can be provided if needed, but batteries are not included. Bring reliable batteries and keep them protected from the cold.
You put on crampons and climbing equipment at the glacier. You remain tied to a rope for safety during the climb, which provides protection but also means you must keep a steady pace and follow the guide’s instructions closely.
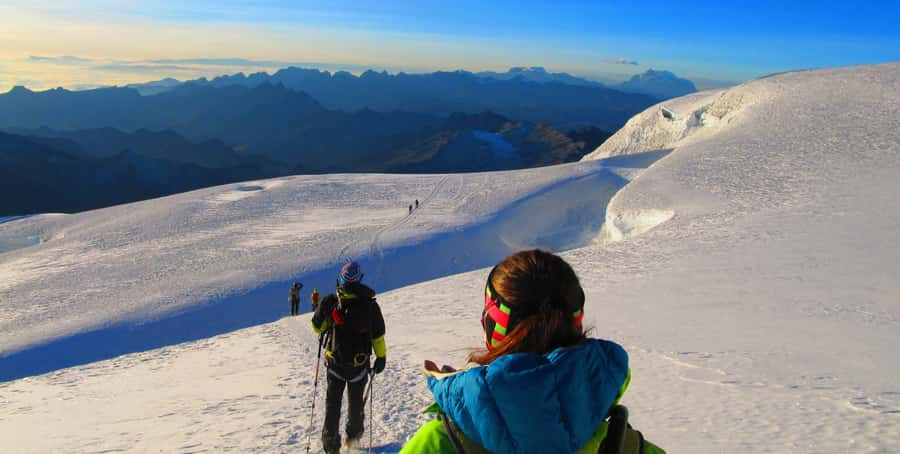
Most of the route follows a glacier trail, with two steep sections. One section is called Pala Chica and is described at about 18,400 feet. The route then passes through a snow and ice wall around 33 feet high before continuing toward roughly 20,000 feet, where the summit comes into view.
The final ridge is exposed and requires focused climbing. You may find this section thrilling, but it is also where fatigue, wind, cold, and altitude can make small errors more likely. The guide’s job is not only to lead the route but also to judge your condition and manage the rope team.
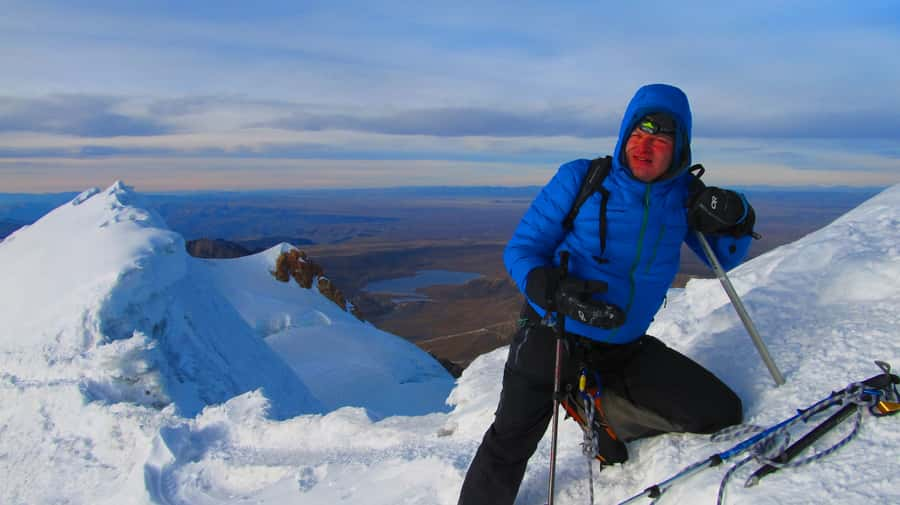
At the summit, you can look across the Cordillera Real toward Illimani, listed at about 21,100 feet, and Illampu, at about 20,900 feet. Take a few photos, enjoy the view, and do not linger too long. The descent is still substantial.
You return by the same route to high camp, take a short rest, pack your equipment, and continue down to base camp. Transport then takes you back toward La Paz. The full climbing day lasts about nine to 13 hours. That range is wide for a reason: snow, pace, altitude, weather, and group condition all affect the timing.
A few more La Paz days to weigh up
- La Paz: Uyuni Salt Flats & San Pedro de Atacama 3-Day Tour
★ 4.1 · 145 reviews - From La Paz: 3-Day Uyuni Salt Flat and Incahuasi Island Tour
★ 4.4 · 8 reviews - From La Paz: 3-Day Biking Tour Death Road & Uyuni Salt Flats
★ 4.7 · 4 reviews - 3-Day Tour to Salt Flats and Lagoons
★ 4.5 · 168 reviews
The equipment question deserves attention
The package includes a long list of useful gear:
- Double mountaineering boots
- Crampons
- Ice axe
- Harness
- Helmet
- Gaiters
- Thick gloves and a balaclava
- Extra jackets and cold-weather pants
- Ropes and protection equipment
- A first-aid kit
- Emergency oxygen
The oxygen bottle is for emergencies only. It is not used as a shortcut for climbing at altitude.
Most of the equipment removes a major barrier for first-time mountaineers. You do not need to buy a complete glacier kit for one climb. But included does not always mean ideal. One poor experience described old jackets, damaged bags, and crampons with a broken strap, along with boots that felt excessively heavy.
I would inspect everything before leaving base camp. Check that the boots fit with your intended socks, the crampon straps close properly, the harness is sound, the jacket closes, and the gloves are warm enough. If something looks damaged, ask for a replacement before the climb begins. This is not fussiness. At 6,000 meters, small gear problems become serious distractions.
Bring your own thermal underwear, thin liner gloves, one thin pair of socks, one thick pair of socks, sunglasses, sunscreen, snacks, and a warm sleeping bag. You also need a backpack, around 50 liters if following the suggested rental size. Keep your personal load light.
Food, refuges, and the practical comfort level
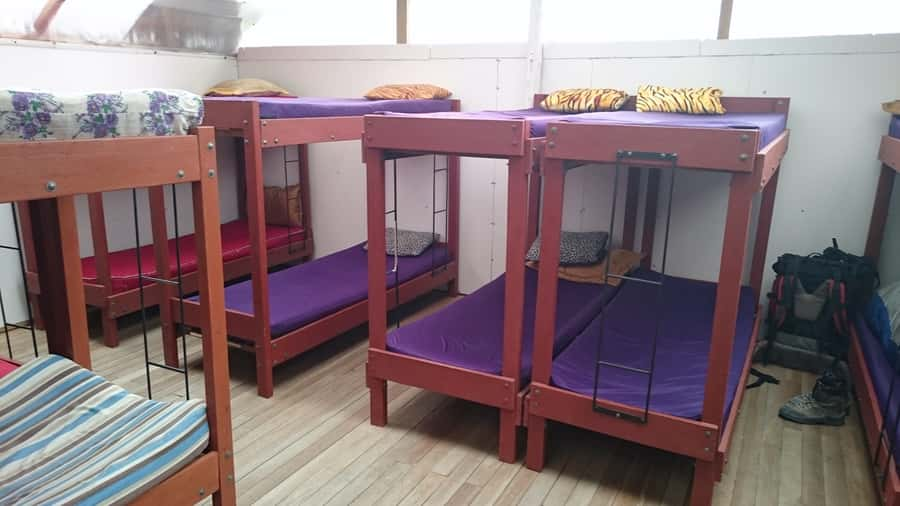
You sleep two nights in mountain refuges, one at base camp and one at high camp. A cook prepares the included meals, and the food plan covers lunch and dinner on day one, all three meals on day two, and breakfast and lunch on day three.
You should not expect hotel comfort. The refuges are functional bases for a demanding climb. The value comes from having a bed, food, and a place to organize equipment near the route, not from luxury.
The guides’ cooking has received especially warm praise. Francesco and Andrés have both been noted for cooking as well as guiding. That matters on a trip where a hot meal and a calm evening briefing can help you face the next morning.
Who should book this climb
This trip suits you if you have good fitness, some mountain experience, and a serious interest in learning glacier travel. You do not need previous ice-climbing experience, since the first day includes instruction, but you should be comfortable with long uphill efforts and difficult conditions.
It is a poor choice if you are treating it as a casual add-on to a La Paz visit. The organizers specifically require acclimatization and a good fitness level. People with heart problems, high blood pressure, mobility impairments, and pregnant women should not take part.
Some climbers use acetazolamide, also called Diamox, before the ascent. The supplied guidance gives 125 milligrams in the morning and 125 milligrams in the evening as the preferred amount. Speak with a medical professional before taking it, since medication is a personal health matter and does not replace acclimatization.
The group can be private, and instruction is available in English or Spanish. A private group may help if you want a more personal pace or direct communication with the guide, though the price and exact group arrangements should be confirmed before booking.
The real strengths and the real compromises
The strongest part of this experience is its structure. You learn on day one, move to high camp on day two, and attempt the summit on day three. That progression gives a first-time climber a chance to understand the equipment and route before the most demanding hours begin.
The guides are another major strength. Recent assignments have included Francesco, Andrés, Francisco, Silver, and Macario. The most useful qualities reported about them are not flashy speeches but practical care: checking equipment, explaining the next day, cooking meals, offering encouragement, and keeping people safe.
The main compromise is that the summit is never guaranteed. Bad weather can stop the climb, and the stated conditions provide no refund for weather-related failure. That may feel harsh, but mountain conditions cannot be controlled by the operator. You need to book this for the full experience, not only for the summit photograph.
The second compromise is gear consistency. Some people find the supplied boots and clothing adequate, while one detailed account found the equipment too old or damaged to trust. Ask clear questions about current gear, and arrive early enough to test everything.
Should you book Huayna Potosí?
Book it if you want a demanding first 6,000-meter objective with instruction, refuge support, meals, transport, and most technical equipment included. The combination of glacier practice and a real summit attempt gives you more substance than a simple high-altitude hike.
Do not book it on a whim, or if you have not acclimatized. Build in time at altitude, train for a long day, bring proper thermal layers, and keep your pack light. I would also confirm the meeting point, hotel transport, equipment condition, sleeping bag arrangements, and guide language before paying.
For a fit and prepared climber, $344 offers strong value. You get a genuine Andean mountaineering experience, not a staged viewpoint visit. Just remember that Huayna Potosí rewards preparation and patience more than optimism.
FAQ
How long is the Huayna Potosí experience?
The trip lasts three days. The final climbing day takes approximately nine to 13 hours, including the ascent, summit time, descent to high camp, and return to base camp.
What time does the summit climb begin?
The summit attempt starts at around 1 AM. You should be dressed for severe cold and have a working headlamp, with batteries supplied by you.
Is ice-climbing instruction included?
Yes. On day one, you spend about three to four hours on the lower glacier learning and practicing ice-climbing and mountaineering techniques. Small ice walls are used with safety ropes.
What mountain equipment is included?
The package includes double mountaineering boots, crampons, an ice axe, harness, helmet, gaiters, thick gloves, a balaclava, extra jackets and pants, ropes, protection equipment, and a first-aid kit. A headlamp can be supplied if needed, but batteries are not included.
Are meals and accommodation included?
Yes. You spend two nights in mountain refuges, and camp meals are included as specified for each day. A cook prepares the meals, and drinks are included with the camp meals.
Do I need to bring a sleeping bag and backpack?
Yes. A backpack of about 50 liters and a sleeping bag are not included, but both are available to rent as add-ons. You should also bring thermal underwear, liner gloves, socks, sunglasses, sunscreen, and snacks.
Can a porter carry my personal equipment?
Yes. Porters are available as an add-on and can carry personal equipment one way, up to 20 kilograms.
Where is the meeting point?
Meet at the Climbing South America flag outside Pachamama Gallery, Linares 940, in La Paz. Confirm transport arrangements in advance because hotel pickup is not included in the stated inclusions.
Just added around La Paz
- Private Tour of Tiwanaku Ruins from La Paz★ 5.0 · 3 reviews
- Private Tiwanaku and Titicaca Day Trip from La Paz★ 4.8 · 3 reviews
- La Paz: Uyuni tour ending in Atacama Chile by bus.★ 3.9 · 3 reviews
- From La Paz: Lake Titicaca and Copacabana Private Tour★ 5.0 · 5 reviews
- LA PAZ: GUIDED TOUR CHACALTAYA + VALLEY OF THE MOON★ 3.6 · 3 reviews
- La Paz: The Feminist Tour★ 5.0 · 3 reviews
- Titicaca Lake: Highlights Tour from La Paz by Bus★ 4.0 · 3 reviews
- La Paz: Uyuni Salt Flats & Lagoon Share Trip (private room)★ 4.7 · 4 reviews
Mountain Climbing Tours, compared.
Browse the lists this tour appears in